
How to upgrade your plan
Terakhir diperbarui
Move to a paid plan for more AI credits, no watermark, and the full feature set. Only the workspace owner with a verified email can buy a plan.
From inside the app
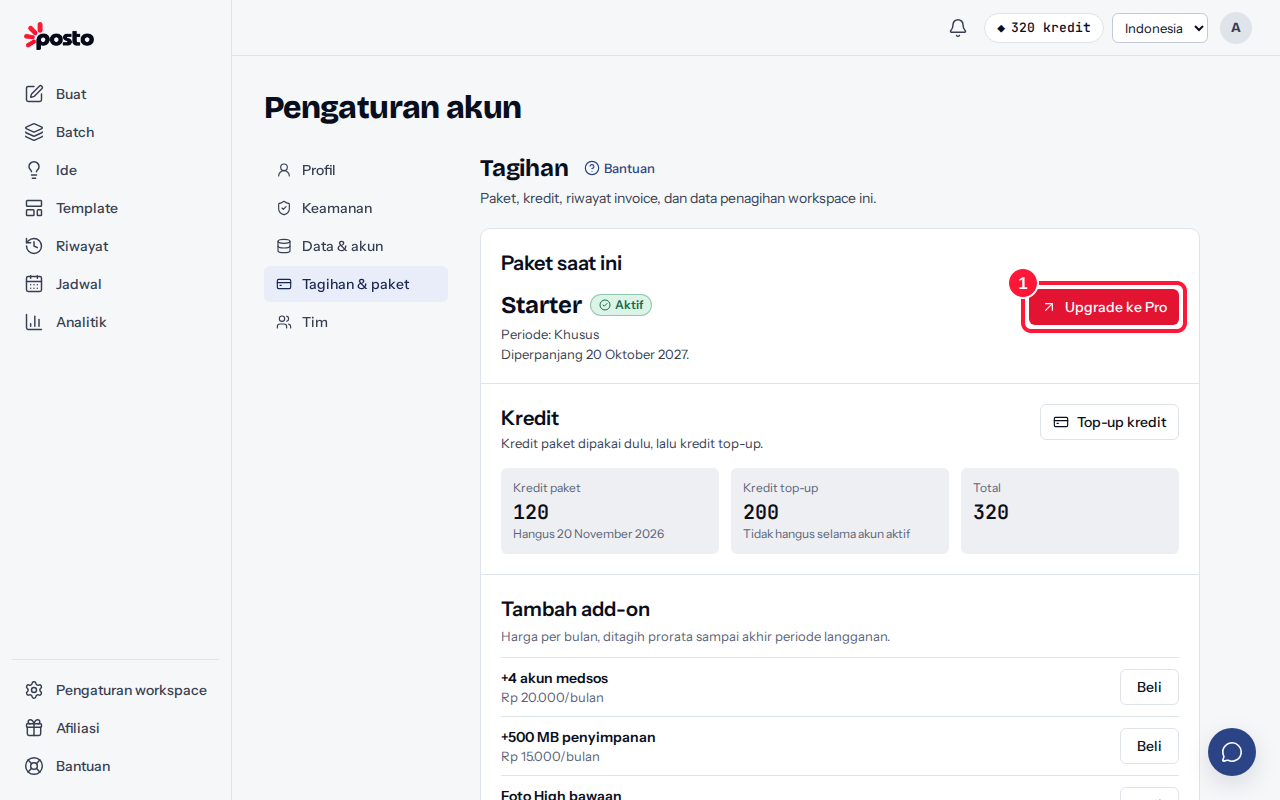
- Open the account menu → Plan & billing (/app/account/billing), then click Upgrade to {plan}. To choose a different plan or period, click Change plan or period, pick a Plan and Period, then click Continue.
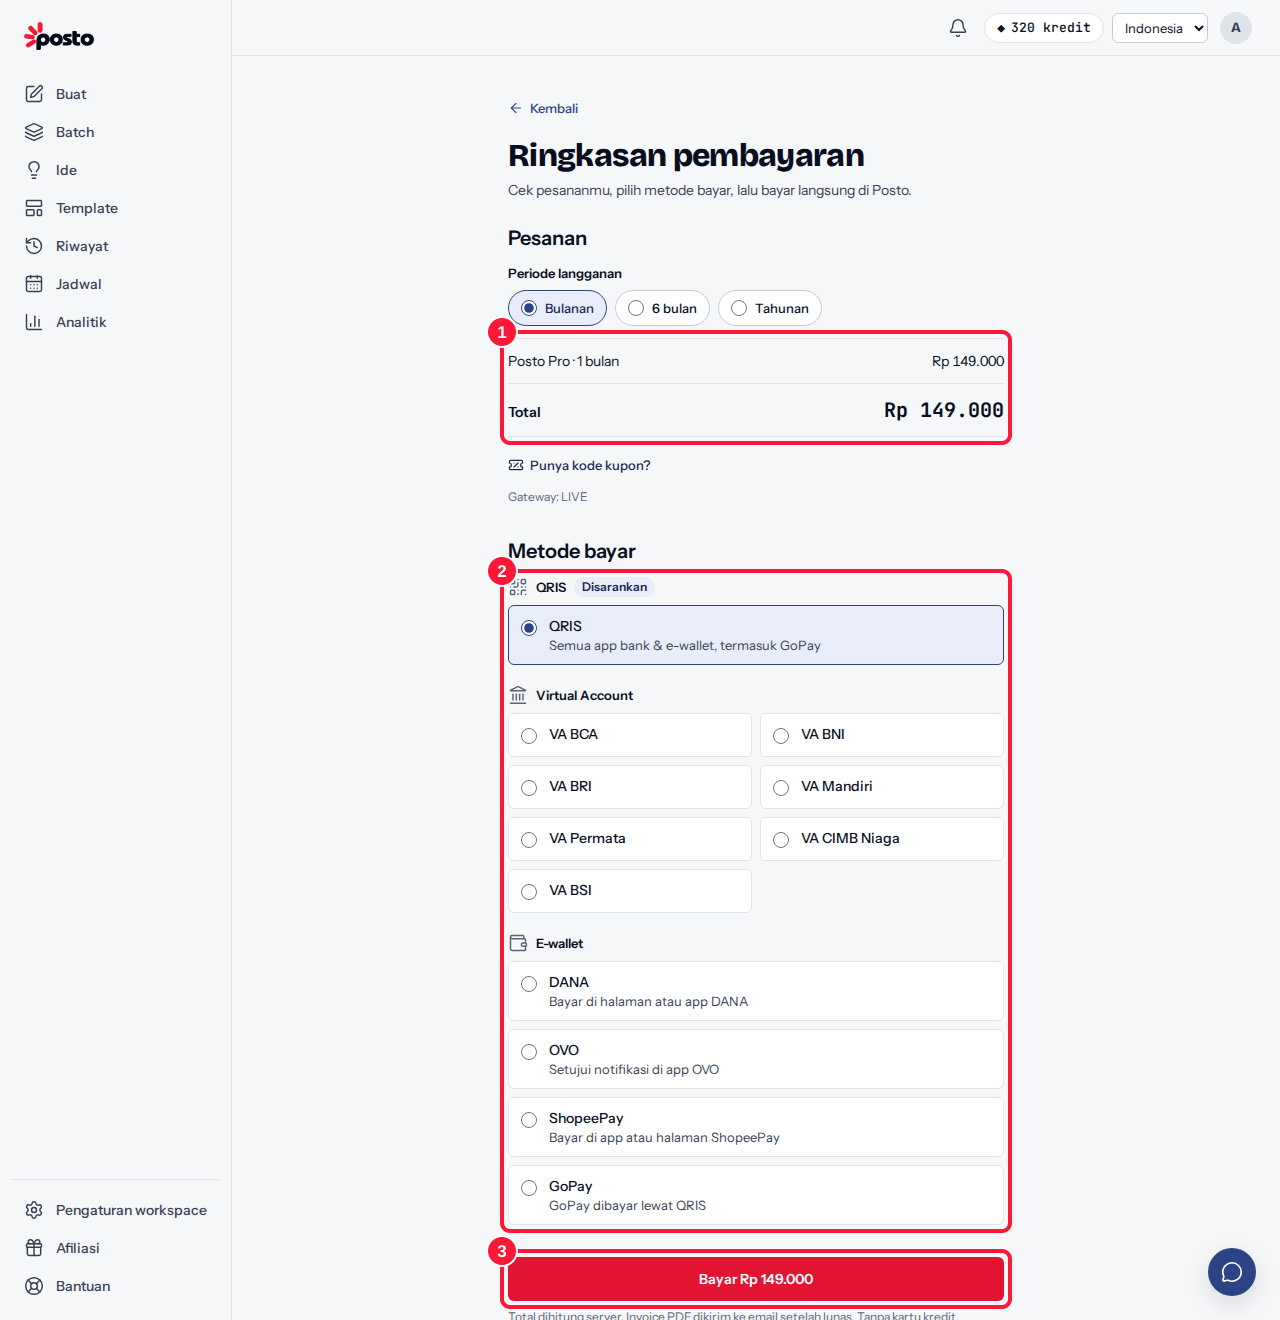
- On the Payment summary page, check the Order section (subtotal, discount, total).
- Choose how to pay under Payment method: QRIS, E-wallet, or Virtual Account (Virtual Account appears for invoices from Rp 80,000).
- Click Pay {amount}, then complete the payment on the Pay invoice page. Your plan activates automatically once the payment is received.
From the Pricing page
- Open Pricing and choose a period: 1, 3, 6, or 12 months. For longer periods, the price shows per month along with how much you save.
- Click Choose Starter, Choose Pro, or Choose Ultimate. No account yet? Sign up first, and you'll go straight to the Payment summary.
- Continue with steps 2–4 above.
Upgrading mid-period?
An upgrade with the same period takes effect right away: you only pay the difference for the remaining days (prorated). If the difference is below the minimum payment (currently Rp 10,000), you're charged the minimum; the reason shows on the Payment summary. Changing the period (e.g. monthly to yearly) and downgrading take effect from the next period.
Have a coupon code?
Enter it on the Payment summary page. See Use a coupon.
Still stuck? Contact [email protected].
Apakah artikel ini membantu?
Artikel terkait
Belum ketemu jawabannya?
Tim support siap membantu. Sebutkan judul carousel atau jam kejadian supaya kami cepat menemukannya.